Feeds:
Posts
Comments

Archive for the ‘Fashion’ Category

Hello everyone!

As most of you would know by now through my Instagram & Facebook, that I’m now preggers with our second daughter!

To date, I’m at 20 weeks into my pregnancy and nesting mode has begun. I’m beginning to list things that we need for K.C.#2 (You guessed it! She will share the same initials as Keia Chan. Read on further and her name will be revealed!)

Since our graduation from being first time parents, we now know the importance of certain items that are essential for the comfort of our baby. During our house-move last November, I kinda gave away a lot of baby & maternity items when we were decluttering (Oops!). So, I needed to get some new ones for K.C.#2. Through our experience, we learnt the beauty and benefits of bamboo fabric. Newborn babies skin are very sensitive, and bamboo is one of the best materials (and luxuriously soft) to be used on their skin which won’t cause any allergic reactions. I simply wanted to get more bamboo items for K.C. so that she will be given the best and not only Keia’s hand-me-downs.

As I was doing my research and shopping around, I chanced upon this brand RAPH & REMY which does personalised premium bamboo baby essentials and gifts. It’s a family business that’s set up by an Aussie & Brit and run out of Singapore. What really caught my eye is their stylish, sustainable and bespoke baby items that only use premium bamboo fabric that’s so breathable and are OEKO-TEX® certified to be free of harmful chemicals, which is exactly what I’m looking for. I had to get my hands on them!

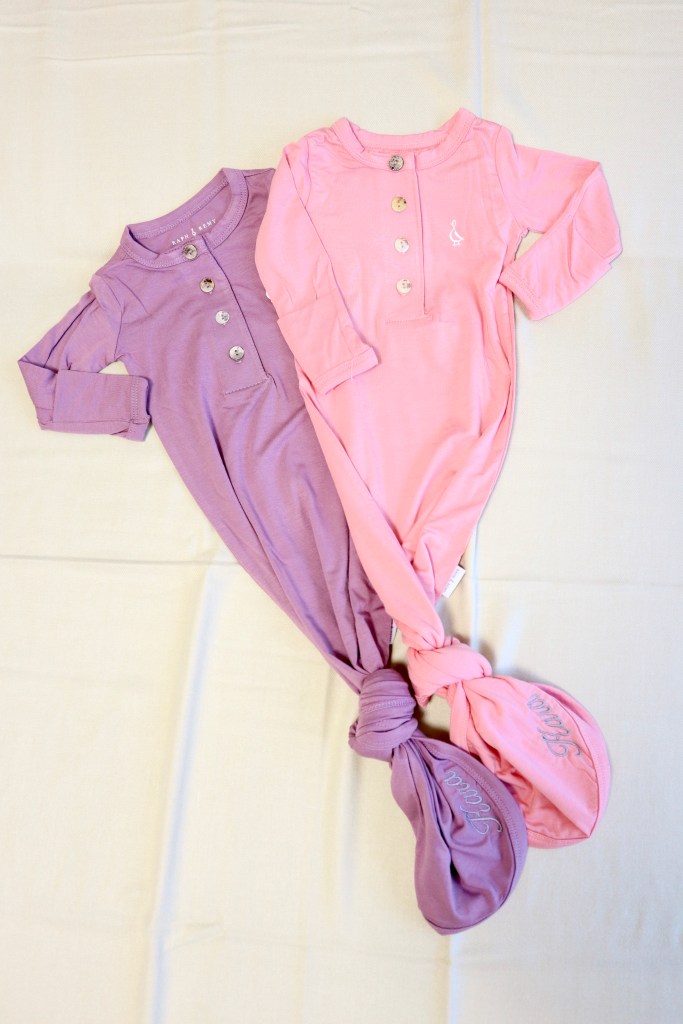
Here are the of newborn essentials that I got for K.C. (Her name will be revealed in the photos!)

I love how pretty my package arrived in, makes me really excited to open up my present!
My boxful of Newborn Essentials

Personalised Knotted Gowns (oh so cute! These gowns remind me of Maggie Simpson!)

Her name is baby Kara!
Kara’s knotted gowns

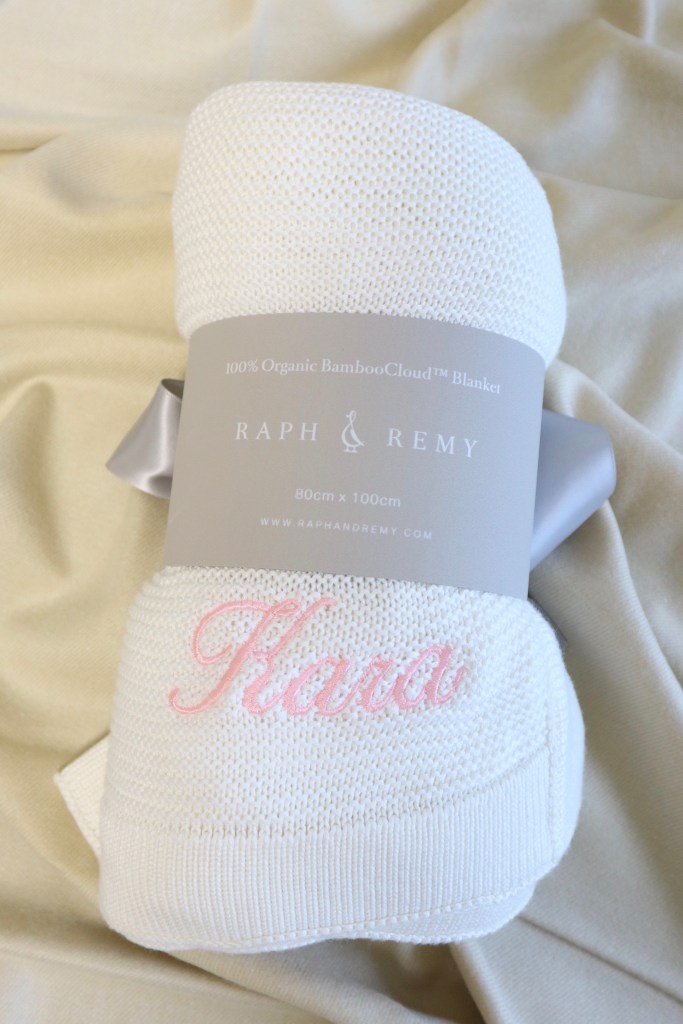
Personalised Organic BambooCloud Cooling Blanket – newborns have to be kept warm but yet not overheated. It’s a tricky balance here, and this blanket would be perfect for Kara!

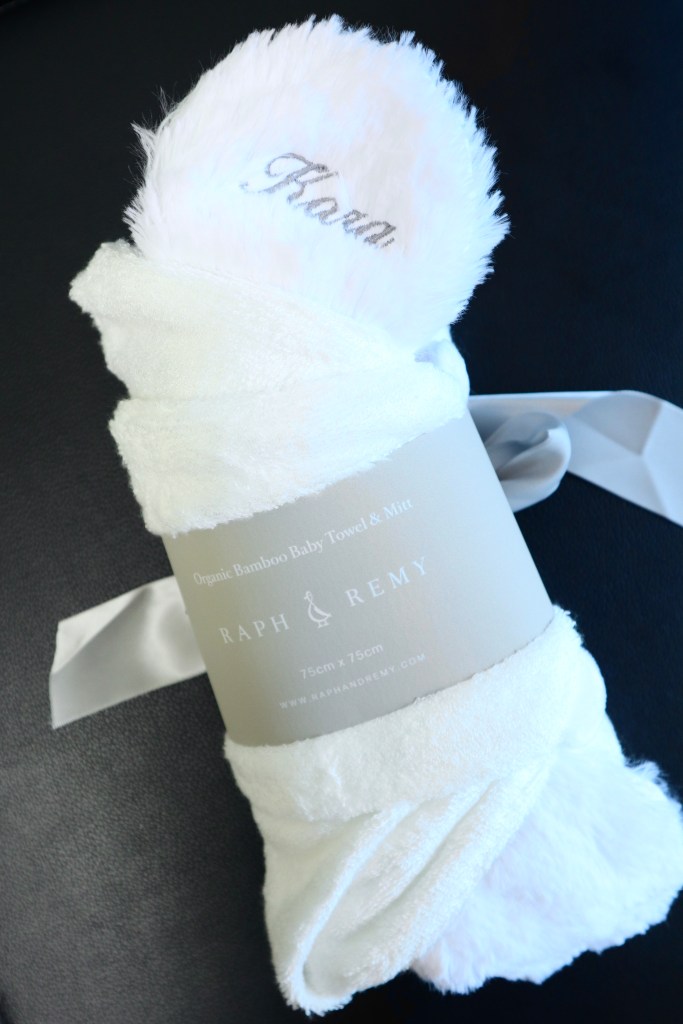
Personalised Baby Towel & Mitt

You really need to get one to feel how luxuriously soft this towel is!
It’s like fluffy clouds on baby’s skin.

Personalised Bamboo Swaddle – swaddling is the way to give newborns that sense of security as they had in womb. Helps them sleep a lot better too when swaddled, and also prevents them from scratching their lovely faces.

I’m a pink-fanatic!

Personalised Plush Pond Pal Mascot – this will be Kara’s first toy from us!

Quack Quack!

Premium Bamboo Baby Booties

Can’t imagine seeing those teeny tiny feet again!

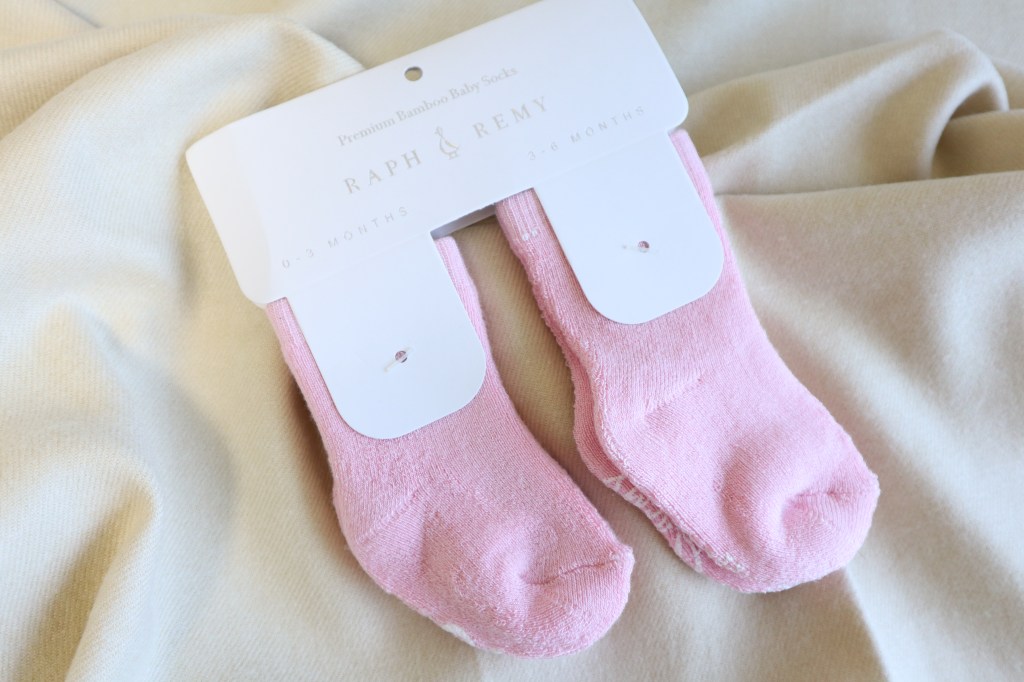
Premium Bamboo Baby Mittens & Premium Bamboo Reversible Slouch Beanie – We threw away most of Keia’s ones as they were so worn out from washing. Definitely need some new ones for Kara

As parents we can never have enough mittens!

Premium Bamboo Baby Socks

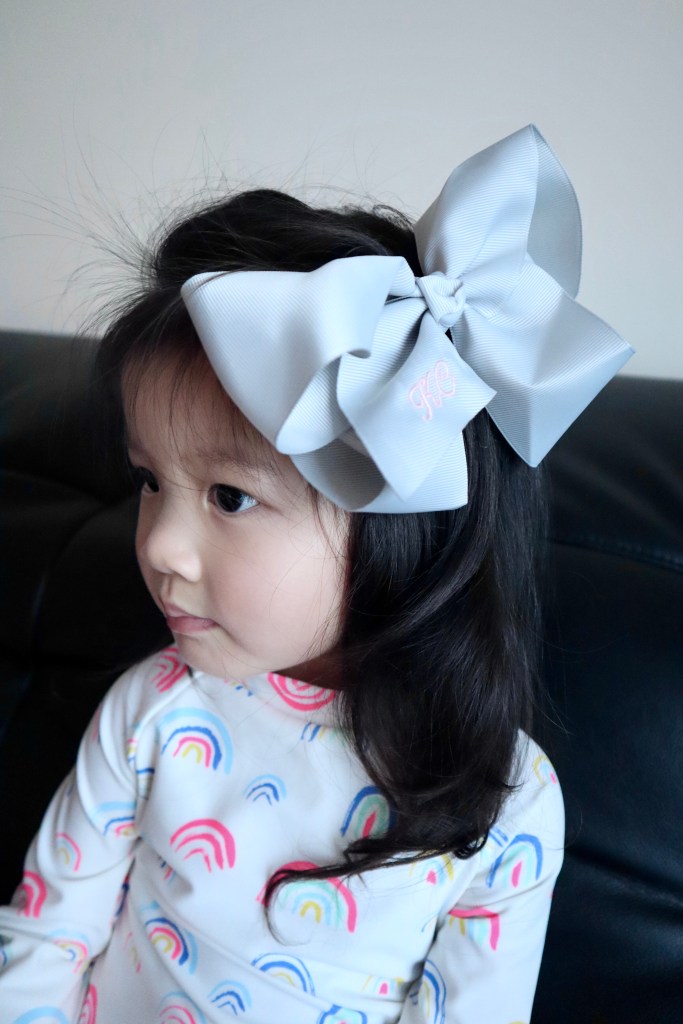
Personalised Bow Clips – As seen on Keia with the K.C. initials! Perfect item to be shared amongst our girls.

Love the oversized bow!
Keia’s feeling pretty in her bow

BubbleGummy Teether

Once again,I simply love the packaging!
A good teether will be well used for at least 2 years, Keia is still chewing on hers as her second molars are now sprouting.

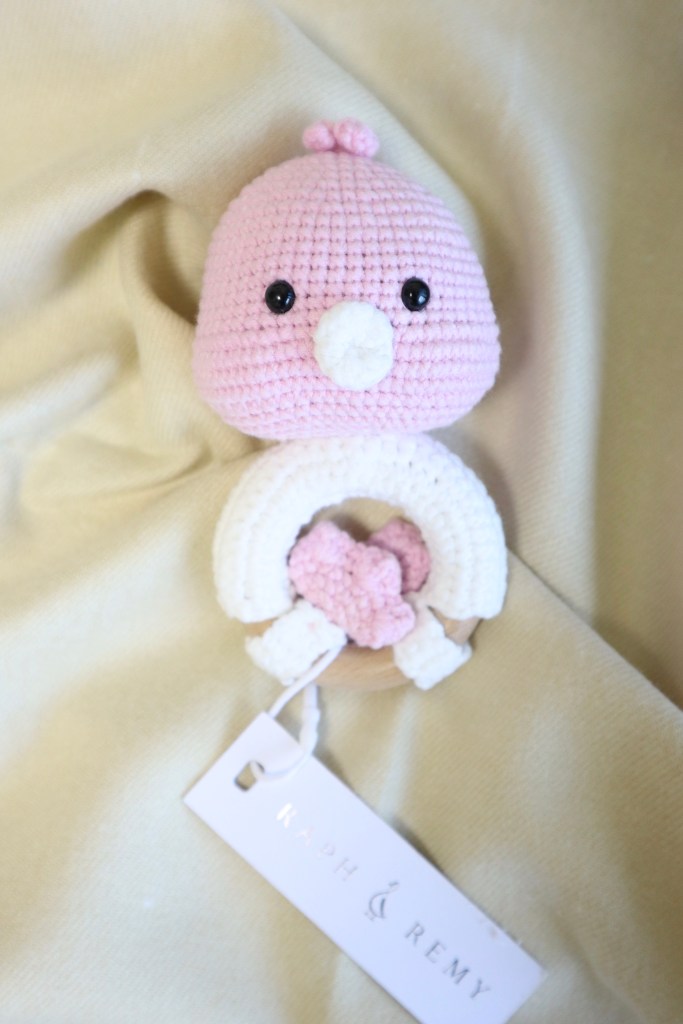
Duckling Rattle – it’s too cute not to get one!

For those of you who aren’t mamas yet, and are always scratching your brains as to what to gift to your friends/family to welcome their bundle of joy, RAPH & REMY also offers a Newborn Essentials Collection Gift Set or 7EssentialSomethings™ Gift Set.

Shipping is FREE in Singapore for orders over SGD$80, and they also offer worldwide DHL delivery. I got mine DHL’d to Hong Kong as honestly, baby things in HK are simply overpriced for the same quality!

I do hope my list does help some of you new moms out there with the essential items every baby needs. Most importantly, we just want the best for our little ones so splurging a little on quality items to keep them comfy shouldn’t make you feel guilty.

XOXO

Jessica

RAPH&REMY™

Facebook https://www.facebook.com/raphandremy/

Instagram https://www.instagram.com/raphandremy/

Read Full Post »

Hello everyone!

Online Shopping

I’m no stranger to online shopping which made me way more lazy to go out and shop for clothes/groceries/household items/make-up etc. but I love it! As it made finding deals and comparing prices much easier.

I was recently made aware of another online shopping portal ShopBack which is trending now. This site is offering us consumers even better deals by giving us cold hard cash returns when we shop through that website (cashback)! Offering us even more savings on top of what the original websites are offering.

ShopBack works with most of our beloved shopping websites like Zalora, Taobao, Reebonz, Sephora, Groupon, ASOS and even Food Panda! So the cashback savings are so easily attainable as these are my everyday website that I frequently shop from.

Deals

On top of  obtaining a percentage cashback while shopping on various online sites through this portal, ShopBack can help consumers find a Zalora discount code for further discounts or learn about a Sephora sale through constant updates on their webpage.

As most of us know that the annual major sale on Asian websites occurs on Single’s Day or 11.11 (双十一) made popular by Taobao, ShopBack also partakes in major sales like these. If you missed out on that, not to fret, there’s a make up sale equally as crazy happening on 12.12. So keep a lookout for the best deals at the upcoming ShopBack 12.12 sales. I know I will be noting that date down in my calender!

How Does ShopBack Work?

Initially, it took me some time to understand how this cashback system works. Most of us know about cashback received from credit card spending and it’s always done automatically to your credit card account so you don’t really bother how it works but this is the first time a website is offering such a deal.

Basically, ShopBack is sharing their income from merchant referrals with the consumers. So it’s a win-win for everyone.

Say for example, the merchant pays ShopBack 10% of the amount spent for items purchased for every consumer referred from their website, ShopBack will keep 4% as income, and return the remaining 6% to you as cash.


Check out this video to further elaborate how this works.

And there’s a referral promotion from now till 9 December that if you successfully refer 3 friends to sign up and shop from their website you can earn an additional $100! Do use my referral link https://www.shopback.sg/?raf=a50uRM to help me earn some extra cash! 😉

It’s simple, easy and gives us more savings. Who doesn’t like a good deal?

XOXO,

Jessica


Read Full Post »

IMG_4043Photo taken after using Voile under my make up

I attended the launch of this latest product by NuBo last week with colleagues from the lovely Starz People at the restaurant & bar & Harvey Nichols in Landmark, Central – Hi-Tea party style. We tried their various signature products like the White Diamond Ice Glow Mask, Cell Dynamic Essence Bio-Gold & of course the newly launched Voile in Hong Kong.

IMG_3951

IMG_3970

We had to fill in a questionnaire about our skin concerns and they would recommend you suitable products to try out.

IMG_3972Trying out the White Diamond Ice Glow Mask which is perfect for dehydrated skin. My hands felt so pampered and smooth after only 10 minutes.

IMG_3974

I immediately fell in love with the Voile & so did my colleagues! The Voile forms a really smooth film over your skin making it look flawless & hides imperfections.

IMG_3956

The Voile is a treatment make up base which is suitable for all skin types. It has anti-aging properties to mattify the skin and hides fine lines and wrinkles, making make up application much easier and skin more beautiful. It also has water resistant qualities to help make up stay on all day comfortably. After using Voile, I realised I don’t really need to use filters or apps like 美图秀秀 to smoothen my skin further! It’s really that good and instant. TWO THUMBS UP!

NuBo Voile’s Key Ingredients are:

  • Bio-Peptides – for wrinkle reduction and stimulates skin’s natural collagen, elastin & Hyaluronic Acid  production
  • New Matrixyl synthe’6 – clinical studies states a 31% reduction in crows feet in 6 weeks twice a day application
  • Inyline – reduces depth of wrinkles by 15% in 4 weeks twice a day application
  • Syn-ake – Botox-like effect to relax expression lines in 90s after application. With twice a day application, clinical studies states a 52% reduction in fine lines and wrinkles.
  • Blurring formula – a breathable micro-film instantly lifts, firms and mattifies skin. Giving you a fresher younger appearance.

IMG_3985

A bottle of NuBo Voile retails at HK$650 per bottle of 30ml and is exclusively available at Harvey Nichols LANDMARK Beyond Beauty, Harvey Nichols Pacific Place Beyond Beauty and Beauty Bazaar Beyond Beauty.

XOXO

Jessica

Read Full Post »

IMG_3371

(Curls using Miracurl, jewellery from Mint Bauble)

Applying foundation on your face is one of the most basic forms of make-up, but it isn’t the easiest to do it well. Firstly, you have to find the perfect match of colour to your skin tone, then a foundation brand that doesn’t just sit on your skin but blends in like it’s part of your skin. To me, the perfect Summer time foundations that work great are RMK’s liquid foundation & Kate’s Powderless Liquid for Cover.


IMG_3342

Both these foundations keep your skin pretty much shine-free throughout the hot and humid days and they don’t cake up from the heat! If you are wondering why my foundations are in different shades – the RMK one darker(one or two shades darker than my skin tone) & Kate a lighter shade(matches my actual skin tone). I use 2 different shades to “sculpt” my face and give it a slimming effect. Great for days when you feel that your face is retaining water from a late night of partying, or its that time of the month…

Start with the darker shade first. In my case, I am using RMK liquid foundation. Apply it under your cheekbone area till your jawline.

IMG_3340

Blend it downwards towards your neck using your fingers or a foundation sponge. (I simply use my fingers)

After that, apply the lighter shade on the peaks of your cheekbone.

IMG_3345

Blend in the lighter shade downwards towards the darker shade. Make sure both the foundations blend in well, without being able to see a distinctive change in colours.

After your base foundation is done, use a highlighter pen (I am using YSL’s Touché Éclat) on your nose bridge, under eye area & smile lines. Focus on your nose bridge – this will make your nose seem sharper & higher. (I often get asked if my nose is fake, or who is the surgeon that did my nose! I take that as a compliment but it’s just good make-up tricks peeps!)

IMG_2347

(picture from previous post on Touché Éclat)

Blend in the highlights & apply a layer of translucent loose powder on your face. Get a brown-shade blush ready to create a more shapely face. Here I am using MAC’s Wonderwoman blush which carries 3 tones – pink blush, brown shading blush & a highlight blush.

IMG_3351

Use an eyeshadow brush to pick up some of the brown blush, apply it on the sides of your nose bridge.

IMG_3352

IMG_3353

This creates a sharper & slimmer nose.

TIP: Use the highlight blush on your under eye and cheekbone area for a radiant glow!

Now that your perfect base is done. (which is oh-so important!) You can just stop right here and add a touch of blush, brows & mascara & you are good to go! But I am going to carry on to show you my favourite falsies to use to brighten up your eyes and NOT have that “umbrellas shading your eyes” look. If you know what I mean… 😉

IMG_3358

These are the 3/4 length falsies which wing-out to longer lashes at the ends. Easily found in any SASA or Watson’s stores. MAC & Shu Uemura have them too but they are a lot more costly.

So, curl your lashes, apply a layer of mascara, then glue on these falsies from about 1/3 distance away from your tear-duct.

IMG_3359

See how they immediately open up my eyes with the winged effect of the lashes. And they are much easier to use too!

IMG_3360

Do the same for the other eye. Apply a tad of lip gloss/balm and we are done!

Ready for a slimmer more sculpted face? Try out these little tricks of mine which I use daily when I head out for castings!

XOXO

Jessica


Read Full Post »

IMG_2776

I am Human… This is how I look like when I first wake up in the morning without a hint of make up on my face. Eyebrows not drawn, dark eye circles not concealed, clean skin… au naturale…

And if I only have 15-20 minutes to get ready and head out, my must go-to beauty item is Yves Saint Laurent ‘s Touche Éclat highlighter pen to give my skin a quick perk-me-up! I’ve been a fan of this for many many years because of its smooth, creamy formula that doesn’t cake up and its portability to bring it around for a quick re-touch even over make up!

IMG_2345

Touche Éclat is great to provide some coverage and masks shadowy areas on your face like dark eye-circles, smile-lines, highlighting your nose bridge and deep-set areas between the chin and lower lip. So this is how I would use it:

IMG_2347

When I am in a rush, I would just use Touche Éclat after my skincare regimen without any foundation for a simple, clean and natural look. Which is what I am going to show you today.

Let me share with you this beauty product of mine: add a dab of Philosophy’s Hope in a Tube and mix it up with Touche Éclat.

IMG_3335

Hope in a Tube contains vitamins E & C with polyphenols which will temporarily erase fine lines immediately.

IMG_3336

IMG_3337

This mixture plumps up the under-eye fine lines & conceals at the same time! Creating a brighter and healthier looking skin.

IMG_2351

As you can see, after applying Touche Éclat on shadowy areas and the bridge of my nose, my face immediately “wakes up”. And if one application isn’t enough for you, you can layer on another coat for a thicker coverage.

After only Touche Éclat application:

IMG_2357

Then, with a dash of mascara, eyebrow pencil, pencil eyeliner & blush. I’m ready to head out! All done in 15 minutes.

IMG_2360

My simple beauty must-have… YSL’s Touche Éclat

XOXO

Jessica

Read Full Post »


IMG_3193

IMG_3248

Attended the Miss Dior fragrance event last night at IFC’s oval atrium graced by the guest-of-honour, HK celebrity, Kelly Chen. A group of us models of mixed nationalities (ranging from Japan, Taiwan, Korean, Hong Kong and of course Singapore) represented Starz People HK at the event.

IMG_3209

When we arrived at the event, we were greeted by a swarm of photographers, flashlights bursting non-stop, adding to the glitz & glamour of it. At the entrance, Dior’s perfumers, who are specially flown in from France, sat a workstation to show off their craft of perfumery.

IMG_3238

IMG_3194

IMG_3195

IMG_3192

Each bottle of perfume is painstakingly bottled, capped and bow-tied by hand by these Artisans, making every single bottle of Dior’s perfume unique.

We were each given a bottle of J’Adore Voile de Parfum.

IMG_3260

This fragrance has strong rose scent and is a mixture of musky, powdery & floral. Extremely feminine. One spritz of this leaves you feeling all sexy yet elegant with the right amount of feminine charm. Perfect for that special date-night!

IMG_3173

Which also explains the huge bed of fresh pink roses as the backdrop for their signature “CD” brand. The rose fragrance is the main focus in all Dior’s range of perfumes.

IMG_3188

Totally in love with all the pretty pink hues from fresh roses to the feminine Miss Dior bottle! Can’t help to take lots of photos of anything in PINK – my favourite colour! Decked out in my rainbow knitted-dress that fits the perfect summery look!

IMG_3253

One last selfie with fellow models from Starz People before the night ended!

XOXO

Jessica

Read Full Post »

IMG_2750


Ever since I went to Tokyo over the Easter long weekend to celebrate my birthday, I was inspired to have my hair curled and styled just like the Japanese! So when I returned back to Hong Kong, I immediately took out my new Miracurl and started fiddling with it. And it was a pleasant surprise that Miracurl made, the once gruelling and time-consuming, hair-curling easy and straightforward more than ever.


Previously, I used my heating tongs (which I had given away since) to create curly locks on my own. This always took me eons and I had to be constantly mindful to not burn my face/neck with the heating tong… Hence, unless I had tons of time, I would never touch those heating tongs.

IMG_2767

But with this latest product from Babyliss Pro, it took me a mere 10 minutes or less! And the curls turned out beautiful and looked as if they were professionally done. It is such a simple tool to use – basically you section your hair no more than 3cm, put the bunch of hair into the V-shaped part of the Miracurl, squeeze, wait for 10 seconds, and it’s done!

I did up a simple video tutorial to show you how simple and easy it really is:

Miracurl is now retailing in Hong Kong at:

LOG-ON, City Store, SOGO, AEON, Fortress, Rosy Rain  at HKD$1689.

In Singapore it is retailing at: 

Selected Watsons stores island-wide at promotional price of SGD$199 from 01-28 May 2014. Retail price is SGD$259.

I know it is one of the more pricey hair curlers in the market, but it is worth every penny; it saves time, it is safe (no more burning of your face or neck *ouch!*) and it is versatile with any hair length! (you can share this with just about anyone, including your boyfriend).

Also, be mindful of the cheaper priced “Miracurls” in the market as there are plenty of knock-offs owing to its world-wide popularity. These knock-offs may not have complied with strict quality controls and may be a hazard to use.

Miracurl has the thumbs up from this happy customer! 🙂

XOXO

Jessica

For more information, do visit:

Facebook Page

BaByliss PRO Asia Facebook Fan Page

MiraCurl ™ Website:

http://www.babylisspro-asia-miracurl.com

Miracurl


Read Full Post »

Friends have been asking me how I am able to do this “professionally” done hairstyle all by myself. Whenever I attend events, dinners, parties etc in this hairstyle, I always get very nice comments on it and often think that I came from a photoshoot because of my nice up-do! So… when I say to them it’s really easy and takes me less than 10 minutes, no one believes me.

This is the messy donut which I prefer for a slightly more casual feel:

IMG_1312And the sleeked donut for a more glamourous Hollywood-look:

IMG_1556

IMG_1553So now… watch this 6 minute video tutorial I made to show you how it’s done! (I wasn’t joking when I said it takes me less than 10 minutes)

Hope this helps you all! It took me some time (a few months maybe?) to figure out this method since I purchased this donut to use. I found the official methods much more difficult and challenging to DIY. Have fun practicing!

XOXO

Jessica


20140330-024217.jpg

Read Full Post »

IMG_2041


It’s been about a week or so since I’ve received my Urban Decay Naked 2 palette (paid £37 for it) in the mail and I’ve been happily experimenting on the wonderful taupe colours! Since I am now living in Hong Kong, it is so hard to find this palette!!! Moreover, the online websites that carry the Naked palette had no stock since the Christmas season until recently. 😦 For those living in 852, you can check out BeautyBay.com or lookfantastic.com for beauty products you can’t find locally. It helps that these websites offer free international delivery!

IMG_2037

So… how do you create a simple day look in under 15 minutes with Naked 2? (HINT: don’t try to use every colour you think it’s pretty! Less is more) I know it’s VERY VERY tempting to want to use all these pretty colours inside the palette all at once! (I was guilty of it on the first few days upon receiving it *hiaks* but it also gave me a good idea which colour combination works) All you need is 3 colours in the palette. (Yes, you heard me… THREE) Namely Foxy, Booty Call & YDK.

First, use Foxy under your eyebrows for a slight highlight. (P.S. Foxy is also a great colour to use to highlight your nose bridge & lighten under eye dark circles) Then apply Booty Call all over your eye socket area. Don’t have to be too detailed with this as all you need to do is to make sure your eye socket area is totally covered with this base colour. 

IMG_1966

Once that is done, now comes YDK to add a 3D effect to your eyes and make them shine.

IMG_2033

As you can see, I only added YDK towards the end of my eye socket area from lash line to the start of my brow bone. (approx. 1/3 of my eye) If you are new to applying make-up, just imagine your eye socket is divided into 3 parts. Tear duct to before the mid line of your eye or the highest point of your eyeball is the first section. Second section is the mid point of your eye or centreline or highest point of your eyeball. And last section is towards the edge of your eye where I am applying YDK. Add a little YDK to that section and slowly blend inwards. Ensure that you don’t overdo this so as to not have 2 stark contrasting colours on your eye. It should look like the colours naturally merge from light to dark.

IMG_1995

With only 3 simple colours, you have a nice, natural & seemingly professional DIY day-look. Now, flip the Urban Decay’s brush over to the flat brush and dip it into the dark colours. I used Busted which is a dark brown, but you can also use Blackout for a sharper look. Line your lash line with this dark eyeshadow colour. I like to wing my eyeliner upwards to create a more cat-eye look. Finally, curl your lashes & coat them with layers of mascara & you are done! Remember to use a coral toned blush for a natural flush look.

IMG_1997

This is my simple 15-minute day look created using the Naked 2 palette’s colours. Hope this is helpful to those who own this palette & those who are new to applying eyeshadows! Have fun!

Now… I’m totally tempted to splurge on the Naked 3 palette to play with a new set of colours! Maybe I will treat myself to it on my birthday in April! *hee*

XOXO

Jessica


Read Full Post »

Needed some really pretty nails to match my Great Gatsby outfit & accessories to attend a theme party over the weekend. And thanks to MyVisitDay.com they arranged a soft-gel nail treat for me at Nail & Waxing@LKF to get them “dressed-up” for the party!

IMG_1883

IMG_1885

Met Fran who is the boss-lady who also did my nails for the occasion. Fran is originally from HK but she was raised in Canada (hence fluent in Cantonese & English), learning the trade of nails & waxing when she was there. She has been in the business for a long time with her first nail/waxing salon in Canada. She had to give up her business back in Canada to come back to HK because of family (which is the most important thing in the world IMO) and thus she opened up Nail & Waxing@LKF 4 years back. I told Fran about my theme party & what I was gonna wear, so she let her creative juices flow & thought up of a nice set of nails to go with my outfit for the night… I was in for a NICE surprise!

IMG_1881

After about 2.5 hours of meticulous manicure with a revitalisation hand scrub, I was presented with the most beautiful set of soft-gel nails!!! Sparkly but yet edgy & not too girly because I’m not a girly-girl. Perfect for me!

IMG_1736

They look even nicer with the accessories I donned on for the event! The nails completed the whole look perfectly! Thank you Fran!

IMG_1781

Here’s some pix I took to create the whole Great Gatsby look… It’s all about accessories & bling! (with a modern touch of sparkly nails to add!)

IMG_1918

IMG_1871

IMG_1850

If you want a good professionally done manicure & pedicure with someone who speaks perfect English & Cantonese, do look up Fran from Nail & Waxing@LKF. She will do magic to your nails!

IMG_1886

There’s a promotion going on from now till 30 April 2014 (who doesn’t like discounts?!). For the soak off gel manicure + revitalising hand scrub treatment that I did (additional charges apply for nail art), it’s now 30% off!

Untitled42_20140310063159806

Drop by Nail & Waxing@LKF for a visit soon as Summer is approaching and we do need pretty mani’s & pedi’s to show off in the Summer! 😉

Address:
Nail & Waxing @ LKF
11/F, 1 Lan Kwai Fong,
Central, Hong Kong

Telephone:
+852 2530 2022

Website: http://nailatlkf.hk/central/

Remember to also LIKE their Facebook Page!

IMG_1884

Read Full Post »

Older Posts »